
The REST API reference can be found in BQN REST API Guide.
REST Deployment
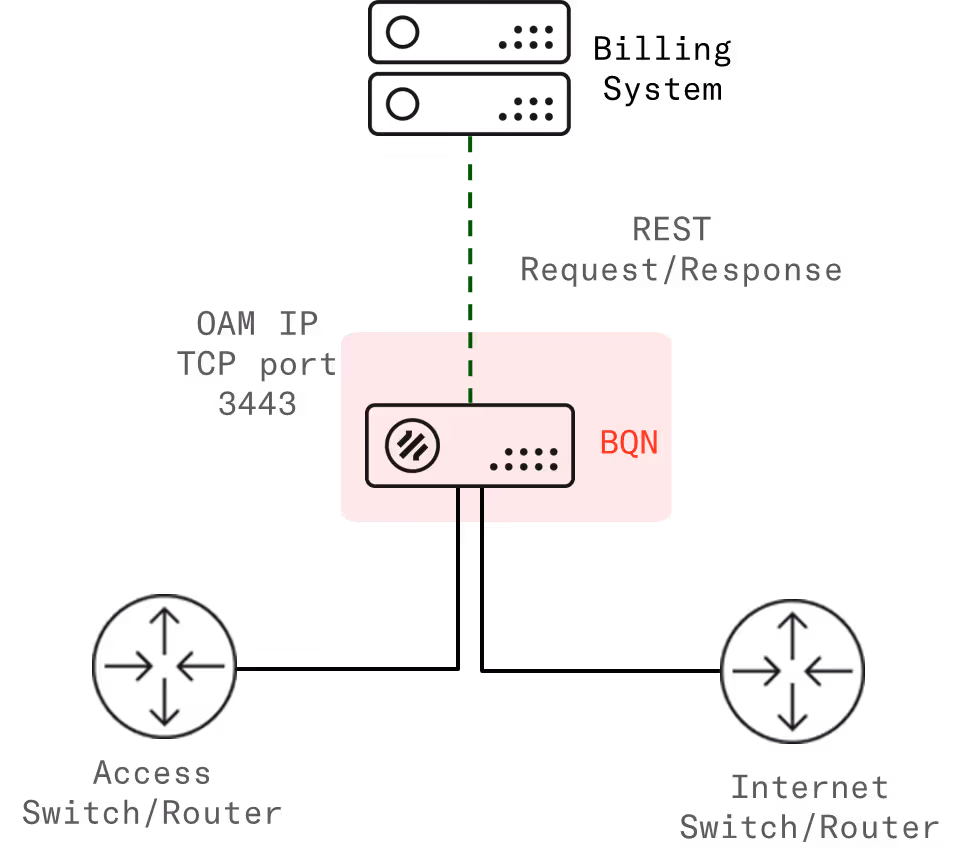
The BQN subscriber rate policies and the assignment of subscribers to subscriber rate policies can be performed via a REST API, which can also provide subscriber metrics. To do this, of course, the BQN must view the IP addresses of the subscriber data traffic, i.e., there cannot be a NAT between the subscribers and the BQN, because the plan limits will be applied for each IP address. It is also important for the wires to be connected correctly (i.e., for the network ports configured as access ports to be connected on the side of the subscribers).
IPv4 and IPv6 addresses are both supported. In the case of IPv6 addresses, the REST API applies a subnet mask (/64 by default) as all addresses of the same subnet are regarded as belonging to the same subscriber.
The integration is between a system that controls the plan definition (e.g., a billing system) and the BQN, through the BQN management interface. The BQN acts as the REST API server. The BQN uses the management IP address (the same used by the GUI) to receive the REST messages listening on TCP port 3443 (configurable).
REST Definition and Selection of Policies
Through the REST API the following policy operations are possible:
- Create rate control policies (the subscription plans).
- Assign a plan to a subscriber.
- Obtain subscriber metrics for up to 3 months: volume used, maximum speed, latency, retransmissions, active/created flows, traffic with congestion and at maximum speed, DPI information, etc.
- Manage time and volume quotas.
The following diagram shows an example in which several policies are created and later on each subscriber has one of those policies assigned.
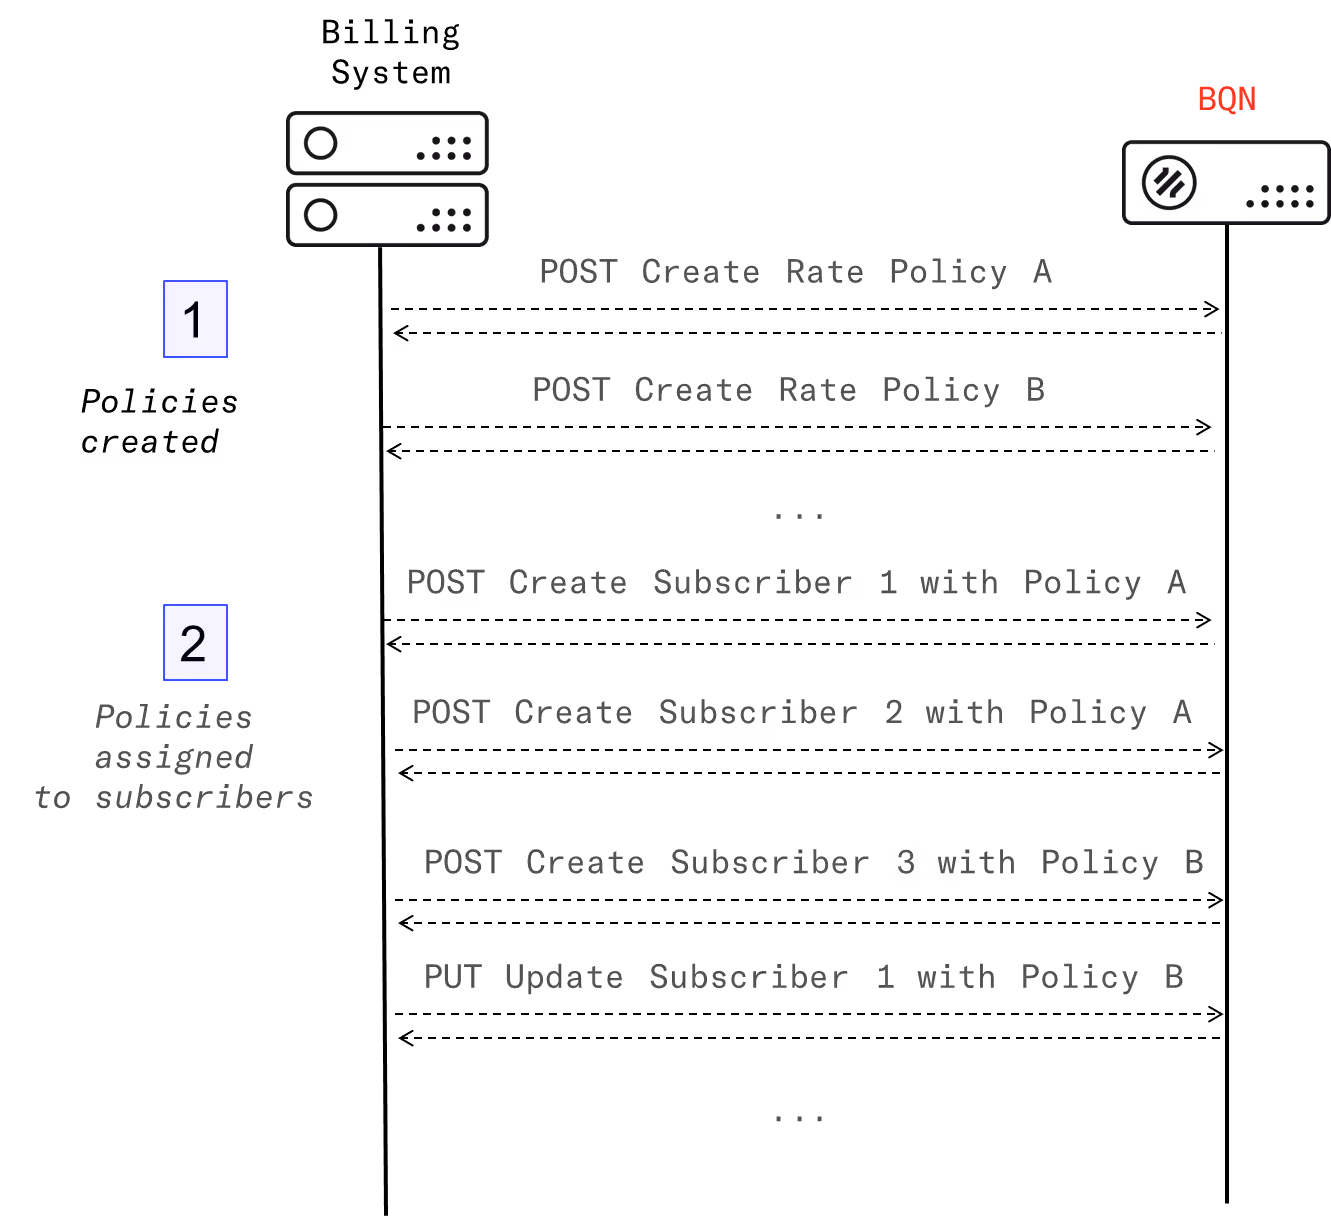
There are operations to create, list, modify and delete both the policies and the subscriber associations.
The REST API is described in more detail in the BQN REST API Guide, that includes the definition of all the possible requests.
REST Configuration
Configure REST in the BQN
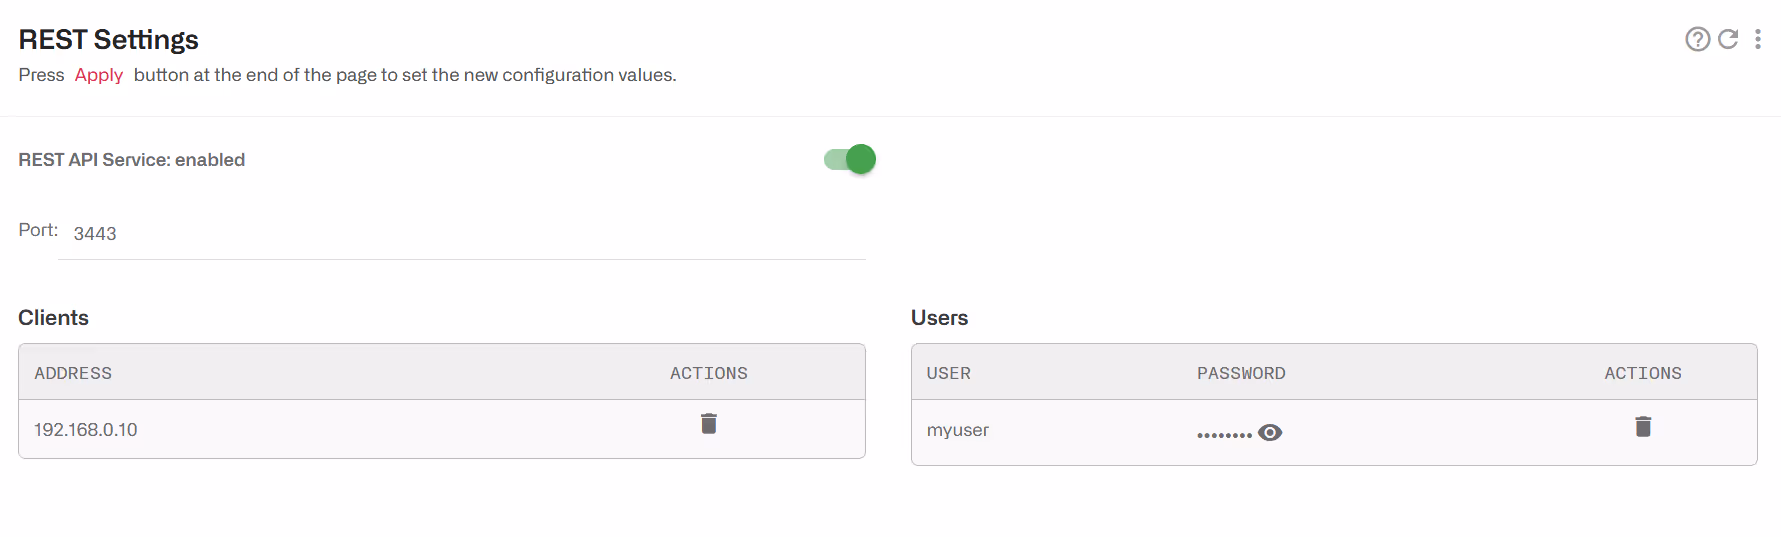
1. To activate the REST API in the BQN, go to Configuration->RADIUS/REST/Billing->REST API and switch Rest API to On.
2. Add the IP addresses of all REST clients to the BQN configuration. In the GUI, go to Configuration->RADIUS/REST/Billing->REST API and click on Add Client…
3. Add the REST users, along with their passwords, to the BQN configuration. In the GUI, go to Configuration->RADIUS/REST/Billing->REST API and click on Add User…
Check REST clients
The REST API integration requires programming the API in the element interacting with the BQN, for example a billing system. To test that the BQN REST configuration is correct, REST messages can be sent manually using curl Linux utility.
As an example, to create a policy named my_rest_policy_1 and asssign it to a subscriber with IP 10.10.1.232:
Check the REST API
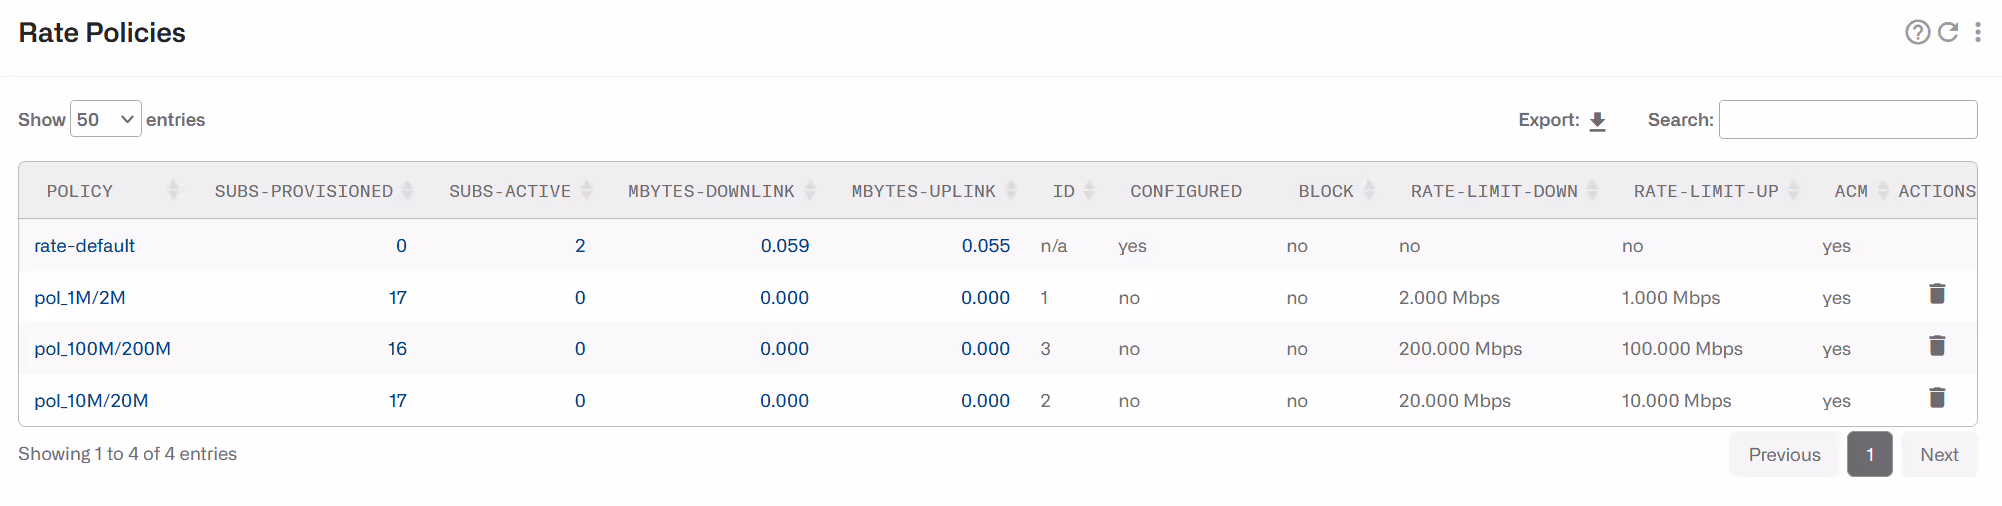
Once the policies and subscriber associations are created,the table Status->Policies->Rate Policies will show the policies coming from REST. For example, the next table shows three policies, with provisioned subscribers that are also active (with traffic):
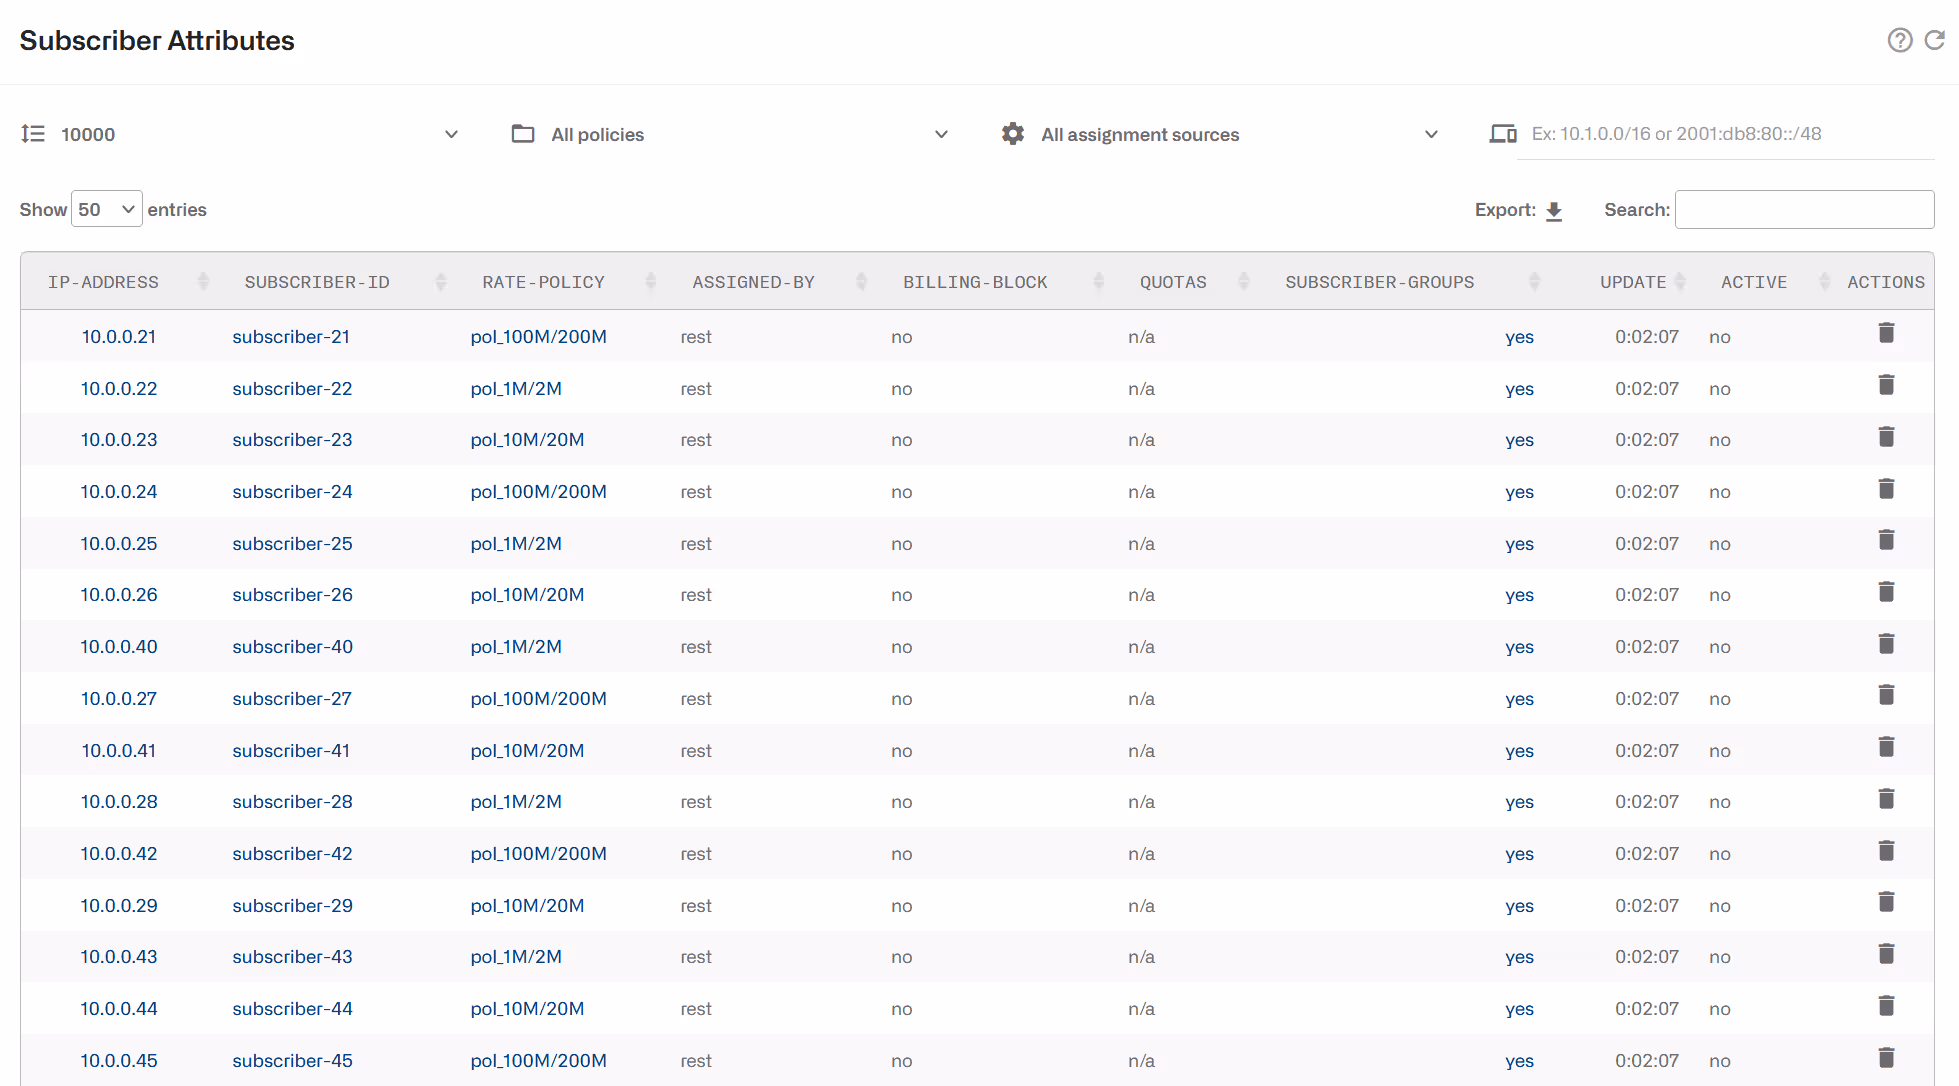
To see the list of subscribers with REST policies, select Status->Subscribers->Subscriber Attributes. The next example shows ten subscribers and their associated policies:
If a digital certificate is needed in the BQN
Sometimes, the REST clients need a specific digital certificate to validate the access.
Log as root to BQN Unix shell.
Look for the following directories:
If the directories do not exist, create them:
Copy the certificate and its key in the following files:
(you can use scp to transfer previously the certificate files to the BQN server).
To apply the change, reboot the BQN server in Administration->Reboot.
Lorem ipsum dolor sit amet, consectetur adipiscing elit. Suspendisse varius enim in eros elementum tristique. Duis cursus, mi quis viverra ornare, eros dolor interdum nulla, ut commodo diam libero vitae erat. Aenean faucibus nibh et justo cursus id rutrum lorem imperdiet. Nunc ut sem vitae risus tristique posuere.
Lorem ipsum dolor sit amet, consectetur adipiscing elit. Suspendisse varius enim in eros elementum tristique. Duis cursus, mi quis viverra ornare, eros dolor interdum nulla, ut commodo diam libero vitae erat. Aenean faucibus nibh et justo cursus id rutrum lorem imperdiet. Nunc ut sem vitae risus tristique posuere.
Lorem ipsum dolor sit amet, consectetur adipiscing elit. Suspendisse varius enim in eros elementum tristique. Duis cursus, mi quis viverra ornare, eros dolor interdum nulla, ut commodo diam libero vitae erat. Aenean faucibus nibh et justo cursus id rutrum lorem imperdiet. Nunc ut sem vitae risus tristique posuere.