
Installation Problems
Check the following:
- The ISO should have been copied to a USB drive with MBR partitions and DD mode.
- The server BIOS should have its factory default boot mode (for example, DUAL).
- If there is a RAID controller, a logical drive must be configured and marked as bootable.
- Check if server used in the installation meets BQN hardware requirements.
- Check that the installation was done in the hard disk and not overwrote the USB drive.
No Access to the Management IP Address
The BQN uses a dedicated network interface for management. The management interface supports both the SSH and WEB (HTTPs) services. In case of problems accessing the configured management IP check the following:
- Ensure that the management network interface port is connected to the appropriate network.
- Verify that the link state of the management network interface is up. If the management interface is connected to a network switch, verify that the port in the switch is up and its attributes match the properties shown by the show interface command.
- If accessing the management IP address from a different network, make sure that static routing is configured to the access network, as explained in the Network Interface section in the User Guide.
- If there are firewalls in the management network, allow access to TCP port 22 for the SSH service and TCP port 443 for the WEB service.
- Verify using the system console that the management IP address and network prefix are correct. Connect a monitor and a keyboard to the server and login as root:
- If you suspect the OAM IP settings are incorrect or unknown, connect a monitor and a keyboard to the server and login as root to change it using the bta wizard in interactive mode. For example, to change the management interface to en0o1 with IP address 10.10.10.12/24 (press enter to accept suggested response):
If the interface is not available at the time of the change (for example, participated in a wire), a message will request a reboot. After the reboot, the BQN should have the new IP and management network interface.
- The BQN management interface may be protected by its own firewall. The problem could be that your source IP address is not included in that firewall white list. This could happen even for addresses from the same subnet of the BQN management IP if the subnet is not part of the firewall rules. You can disable the firewall temporarily until the connection to the management port is restored. Connect a monitor and a keyboard to the server and login as root:
Once the management IP is reachable, you can define the new white list of allowed source IP ranges.
- If the command <span class="character-highlight">wizard bta interactive</span> fails, connect with a console and a keyboard and try changing the configuration directly. In the following example, the management interface is in en0o2 and we will move it to interface en0o1 and from IP address 192.168.0.121 to IP address 10.0.0.121, with default gateway 10.0.0.1:
Web not Accessible
- Check that the management IP address is accessible using SSH,
- Check that you are using HTTPS in the access (HTTP is not supported). Example of URL: https://192.168.0.121
- Check that you are using bqnadm user (root cannot be used in GUI access).
- When installing from scratch, make sure the command wizard bta was run (otherwise, the GUI web service will not be active a no bqnadm user created).
- Verify that the SSH port of the BQN server has not been modified. To access the BQN using a port other than 22, you can define port forwarding rules in router on the access path, but the BQN SSH port cannot be changed. Logging to the server as root, you can verify that the SSH port is 22 as follows:
If needed, comment the line that specifies a port other than 22.
- Check that your browser is supported (Edge, Firefox, Chrome). MS Explorer, for example, is not supported.
Network Interface Down
If the Network Interfaces icon in the Dashboard is not in green.
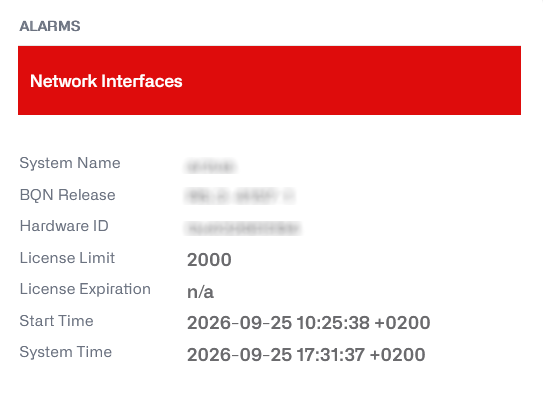
Go to Configuration->Interfaces->Data Wires
In Red (Critical)
- If there is no wire configured, create one.
- If there are wires configured but their interfaces are not in UP state, this most likely indicates that the interfaces are not Intel compatible. Go to Configuration->Interfaces->Data Wires and click on the down interface to see the model (PCI vendor ID) and confirm it is not Intel. Remove the wire and create a new one with both interfaces in pcap mode. This should place the interfaces in UP state, but with much lower throughput capacity (less than 1Gbps).
- If there are wires configured, with interfaces in UP state but with the LINK down, there is a problem in the connection with the other equipment. Connect both interface ports to one another in a loop using a suitable cable/fiber. If both interfaces are in up, then the problem is on the other equipment.
If the link is still down and optic ports are used, verify that the transceivers:
- are Intel-compatible
- are supported (see Supported Network Cards for a list).
- of the type required by the installation (e.g., SFP+-LR in an installation with monomode fiber and SFP+-LR on the other side).
In Yellow (Notice)
- If the wires that appear as down should have traffic, follow the steps of the previous section (Critical)
- If the wires that appear as down are not in use and you want to remove the notice signal, you can delete the unused wires. Consider that changes in the wire configuration will stop the traffic for some time (between 10 seconds and two minutes, depending on the server configuration).
Inverted Traffic
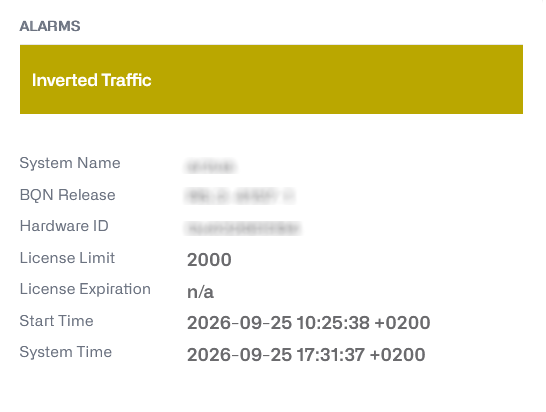
If the Inverted Traffic icon in the Dashboard is in orange (Warning), it is indication that traffic throughput in the uplink direction is bigger than in the downlink direction. This can be normal in small deployments (less than a hundred subscribers, like a BQN in a lab) but in a network deployment most likely indicates that some of the wires have been connected incorrectly, with the access port connected to the Internet side and vice versa.
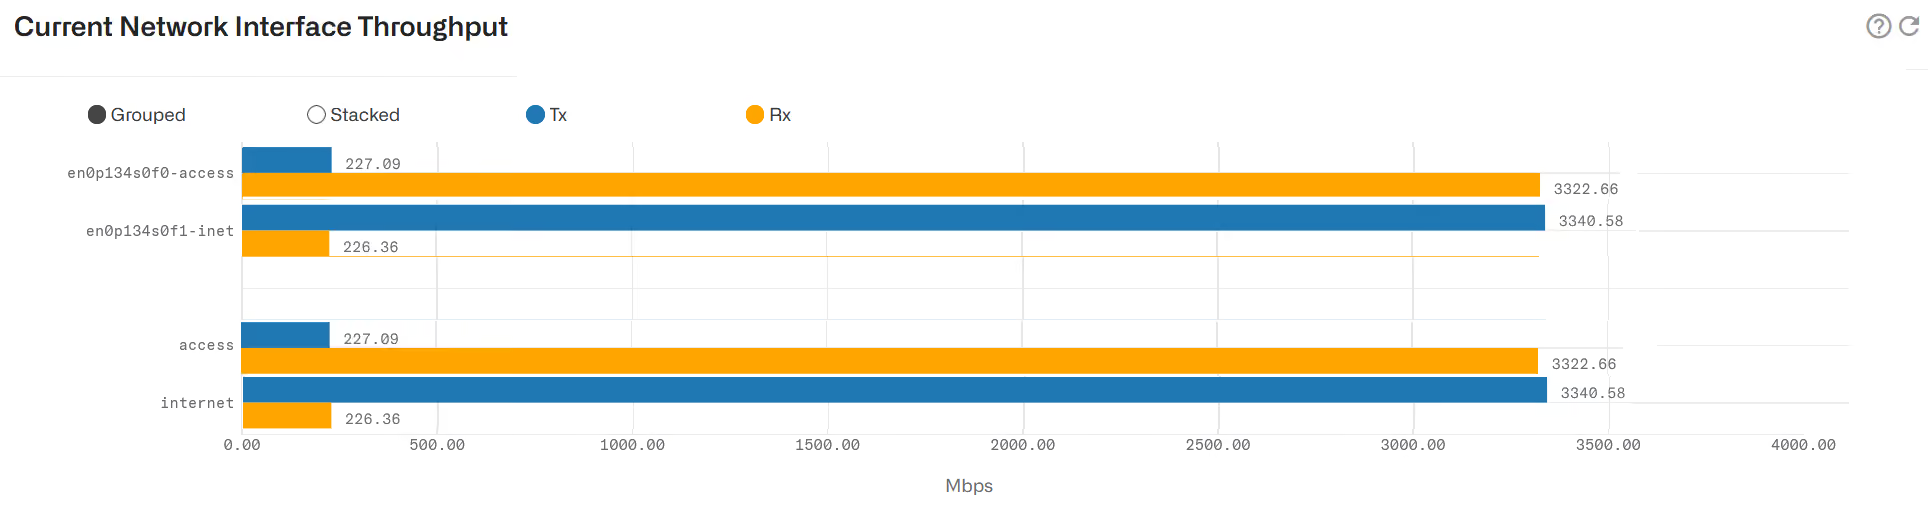
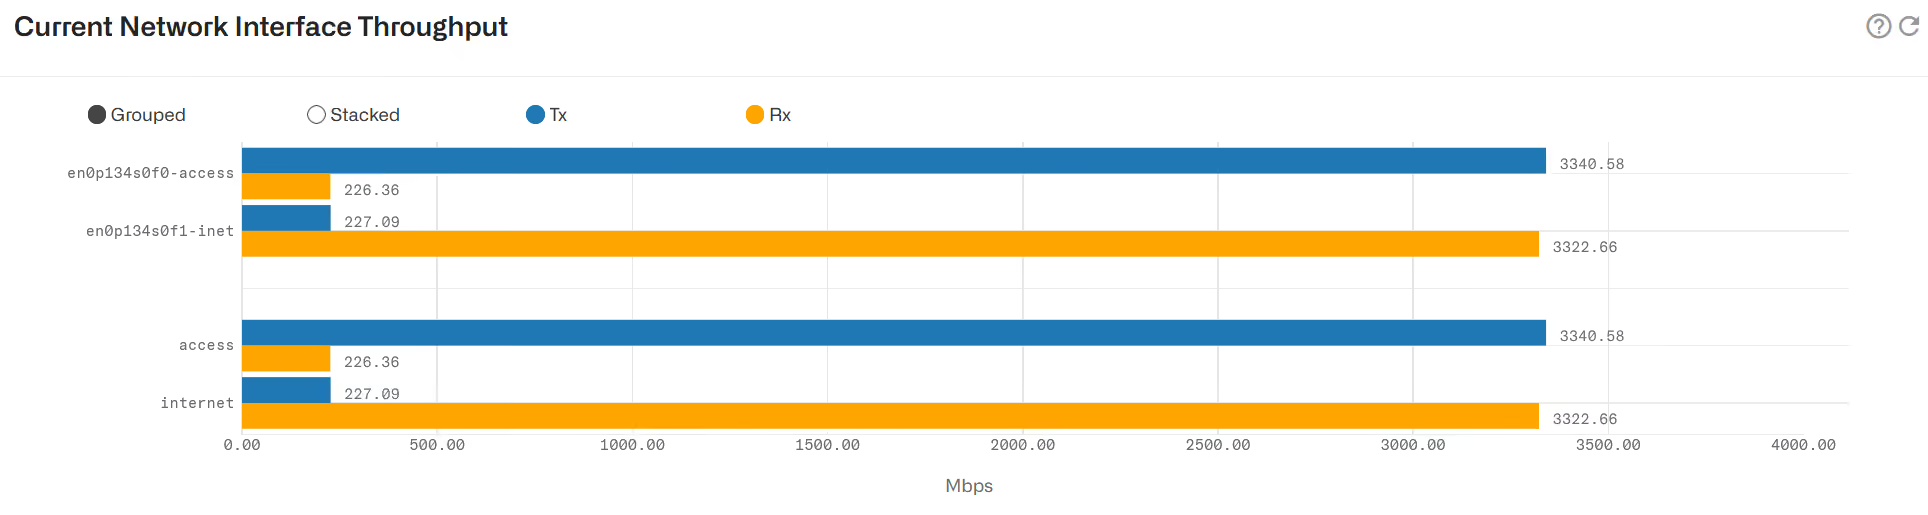
To verify that this is the case, go to Status->Interfaces->Throughput and check that the access interfaces transmit more traffic than they received and vice versa in the internet interfaces. If this is not the case, it is an indication that the wire is inverted.
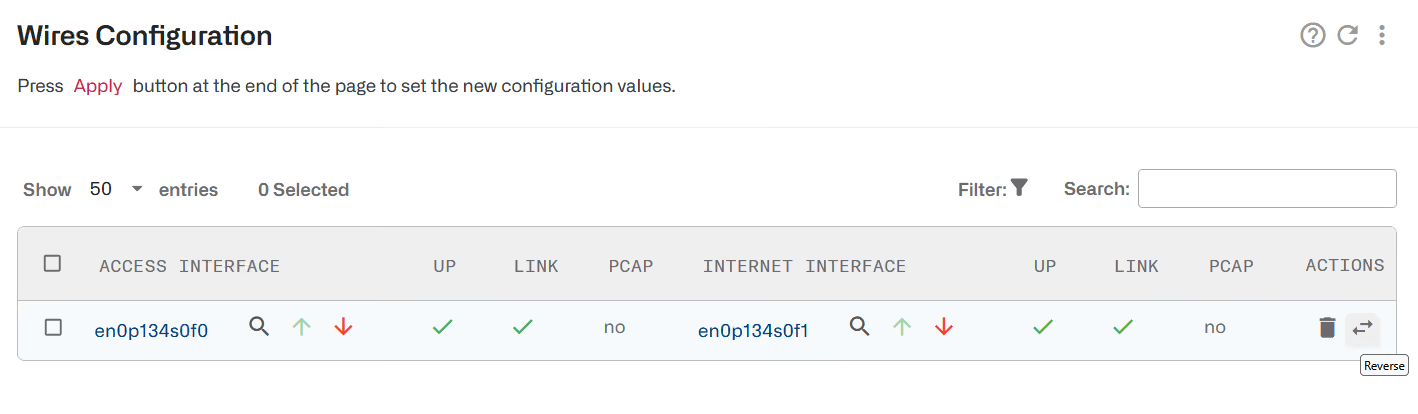
To fix the issue, go to Configuration->Interfaces->Data Wires and, in the inverted wire, press the Swap interfaces icon.
Status->Interfaces->Throughput should now show more sent traffic than received traffic in the access interfaces:
Low Traffic
The Low Traffic icon in the Dashboard is yellow and in NOTICE state.
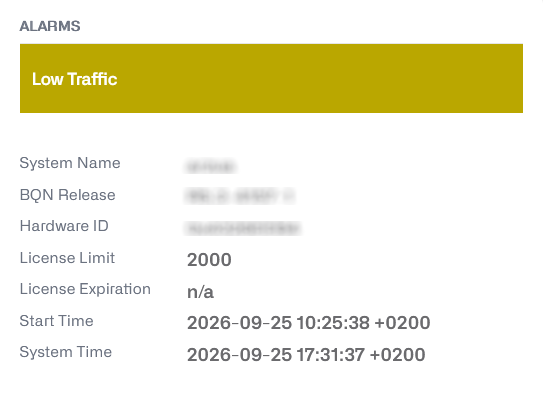
Hover the mouse over the icon to confirm that Traffic-low notice is shown. It indicates that there is very little traffic going through the BQN server. This is normal if the system is still waiting for traffic being routed through it. However, in a system in production, it can be an indication that some failure elsewhere in the network is preventing the traffic to reach the BQN server.
Asymmetric Traffic
Asymmetric traffic happens when the BQN server only sees one of the traffic directions (uplink or downlink) and not the other.
Asymmetric traffic can affect all the traffic going through the BQN or only part of it.
The TCP optimization requires symmetric traffic, so the asymmetry causes a degradation of the subscriber experience and the TCPO must be disabled in the affected traffic while the issue is fixed.
All Traffic is Asymmetric
The Low Traffic icon in the Dashboard is orange and in WARNING state.
Hover the mouse over the icon. If either Traffic-uplink orTraffic-downlink are in warning, this indicates that there is no traffic going through the BQN in that direction and therefore the traffic is asymmetric. If both Traffic-uplink andTraffic-downlink are in warning, then no traffic or very little is going through the BQN and there is no asymmetry.
To disable TCPO in the affected traffic, go to Configuration->Optimization Settings and disable the Overall TCP Optimization switch while the traffic routing issue causing the asymmetry is fixed.
Some Traffic is Asymmetric
The Low Traffic icon in the Dashboard is green, in NORMAL state, and yet, customer complaints are received regarding service degradation.
To confirm if some of the traffic is asymmetric, go to Status->Subscribers->QoE Metrics and set a filter in the subscriber table to see only subscribers with 0 bytes in either uplink (MBYTES-DOWN) or downlink (MBYTES-UP) directions.
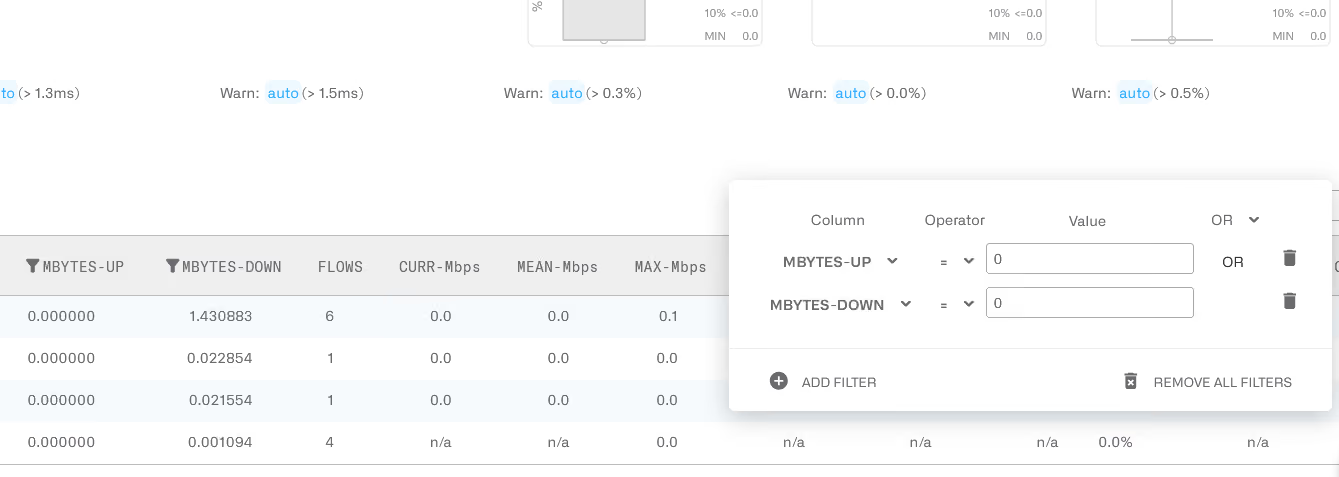
Discard multicast or broadcast IP addresses. For those IP addresses, it is perfectly normal to see traffic only in one direction. For example, IPv4 255.255.255.255 broadcast address or IPv6 ff02:: local link multicast address,
If you see normal IP addresses with 0 bytes in a direction and substantial traffic on the other side, this IP is suffering from asymmetric traffic. Because the issue is normally caused by wrong traffic routing, other IP addresses on the same subnet would suffer it as well.
To disable TCPO in the affected traffic while the routing is corrected, go to Configuration->Subscriber Flows and create a flow policy with TCP optimization disabled, create an Access Profile containing the affected subscriber IP addresses/ranges and link them with a rule. See mode details in this example.
License Manager
If the icon License Manager in the dashboard is in Yellow and the text says “License”, this is because the BQN server cannot reach the license manager. The license manager is responsible of validating BQN SW licenses and also helps Bequant to provide a more proactive support by reporting server problems.
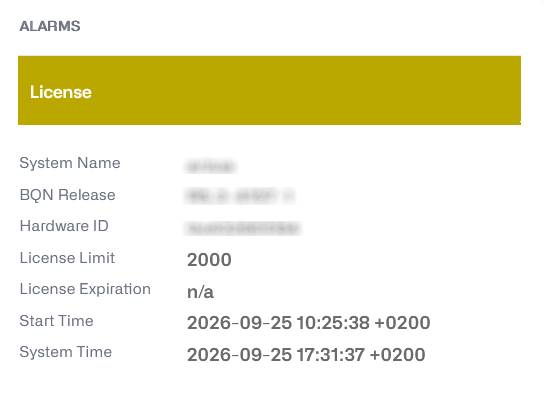
Make sure the BQN server can initiate outgoing connections to the License Manager IP (contact Bequant support for details).
To verify that an outgoing connection is possible, log in as root and do a telnet to the provided IP and port:
The telnet should succeed if the license manager is reachable.
License not OK
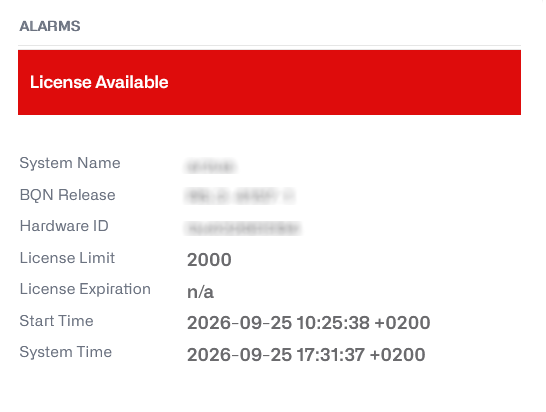
If the License icon in the Dashboard is Red, and the text says “License Available", there is no valid license. This could be due to a number of reasons:
- There is no license defined in the node
- The license is not valid
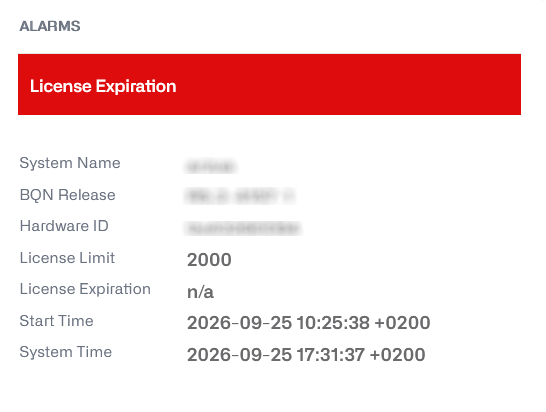
If the License icon in the Dashboard is Red, and the text says “License Expiration", the license is no longer valid (its final date has expired).
Contact your distributor for a valid license.
You can check the license state in Administration->License.
When there is no valid license, the BQN will forward all traffic transparently: the service will not be affected, but none of the BQN advanced processing will be applied to the traffic.
License Limit Exceeded
If the License icon in the Dashboard is Orange, and the text says “License Usage”, the maximum capacity of the license is being exceeded (the total traffic throughput in the BQN server is above the license limit).
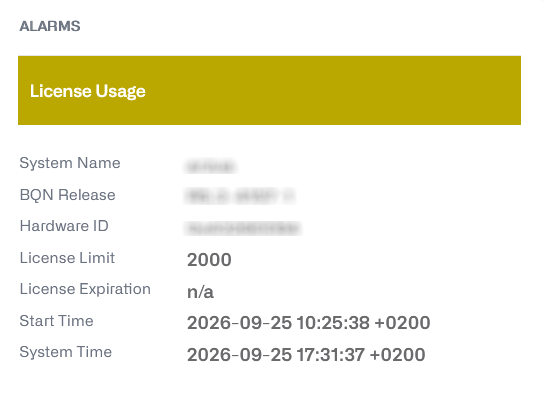
Contact your distributor for a license upgrade.
You can check the license capacity in Administration->License.
In Statistics->Throughput->Overview, a red line will show the license limit along with recent throughput levels.
Exceeding license limit should be temporal, while the license is upgraded to the right capacity.
When the license limit is exceeded, the QoE will not drop any packets; it will simply bridge them.
The effect on the traffic is different at flow and at subscriber session level.
Effects at flow level:
- While the license limit is being exceeded, new flows will have no license.
- Existing flows prior to the license being exceeded are unaffected: if they were being optimized remain so and likewise if without a license.
- Once the optimized traffic falls below the limit, new flows are optimized again.
- Existing flows prior to the license going below the limit are unaffected: if they had no license remain so and likewise if they were being optimized.
- A flow without a license has:
- No TCPO
- No shaping
- It does not generate metrics (retransmissions,latencies, DPI, etc.).
Effects at subscriber session level:
- While the license limit is being exceeded, new subscriber sessions will have no license.
- Existing subscriber sessions prior to the license being exceeded remain initially in their current state: if they were being optimized remain so and likewise if they were not optimized.
- If the license remains above the limit, subscriber sessions being optimized may transition to no license if they accumulate a big number of non-optimized flows.
- Once the optimized traffic falls below the limit, new subscriber sessions are optimized again.
- Exiting subscriber sessions prior to the license going below the limit remain initially in their current state: if they had no license remain so and likewise if they were being optimized.
- If the license remains below the limit, subscriber sessions without a license may transition to being optimized if they accumulate a small number of optimized flows.
- A subscriber session without a license has:
- no ACM,
- no rate limiting
- it continues generating traffic volume totals.
- Quota volume reporting is suspended.
- Blocking at quota exhaustion will not take place.
- The other metrics, like retransmissions, latencies, etc. will be reduced to those from the flows being optimized.
- A subscriber session being optimized will be affected by the fact that some of his flows may not have a license and therefore the subscriber may have a reduced set of measurements in comparison with normal operation. This affects the ACM and also the metrics generated for that subscriber.
The effect of exceeding the licensed limit is that more and more traffic will no longer get QoE functionality, and, conversely, the amount of traffic getting QoE functionality gets lower. Once the amount of traffic getting QoE functionality is below the license limit, new flows and subscriber sessions will regain QoE functionality. This continues until the license limit is exceeded, after which the effect repeats again. With this oscillating behavior, the QoE keeps providing functionality to traffic up to the license limit. The BQN is continuously checking the level of throughput vs the license limits (every minute or less), so the adaptation is pretty quick.
High CPU Load
If the CPU icon in the Dashboard is not in green, some CPUs are running at abnormally high levels. This is normally due to unbalanced traffic (concentrated in a few subscriber IPs) or to too much traffic being proceeded by the BQN server.
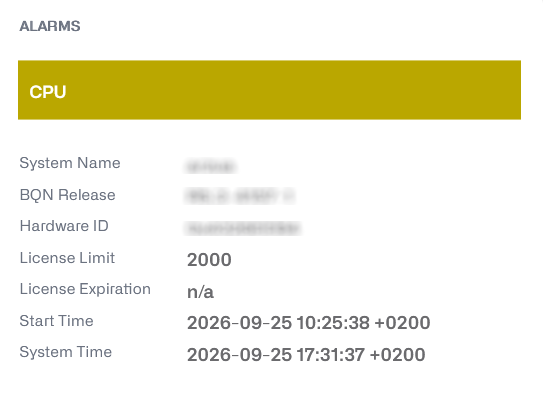
The throughput level can be verified in Statistics->Throughput->Overview and the CPU levels in Statistics->System->CPU.
There are two alarm types, depending on the CPU load levels:
- Orange if some CPU coresare at high load (above 80% usage).
- Red if some CPU cores are at very high load(above 90% usage).
First, some introduction to BQN core usage.
Find out CPU core affinities: IOs and workers
In the BQN, critical processes run with top priority in their assigned CPU cores. This is referred to as core affinities. Two processes areassigned CPU cores:
- IO processes: they are responsible for reading and writing operations of the traffic packets in and out of the network interface ports.
- Workers: they are the data plane processes responsible for all the packet processing (TCP optimization, ACM, various shaping limits, DPI inspection, etc.).
The rest of the BQN processes run in any available core, but in the case of a designated one, the scheduler may preempt the low priority process to run a high priority one. If the server has enough CPU cores, some are left unassigned so they can be dedicated to processes with low priority.
To see the CPU core affinity in your server, run this command:
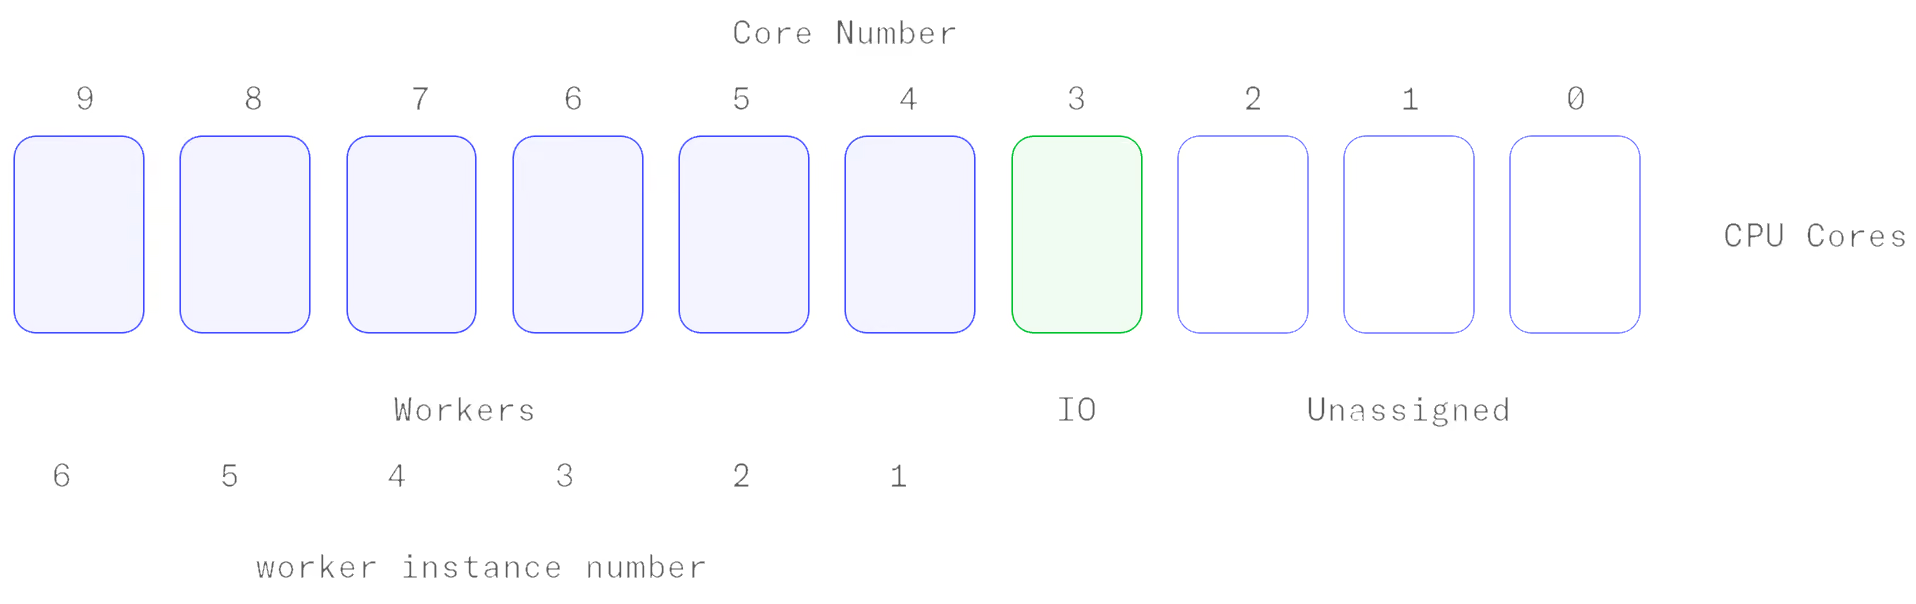
In this example, the server has 10 cores. Seven cores are assigned to high priority processes: six to run worker processes and one to run IO processes. Three cores are left unassigned, ready to run processes with lowpriority. The specific core assignment will depend on the number of CPU cores, number of wires and the speed of those wires. The BQN will try to do the most optimal assignment based on those variables. In the example, there is one wire of 10 Gbps throughput capacity.
The affinity field indicates the cores assigned. In the example, the IO is on core number 3, with 0 as first core (0x8 = 1000) and handles the traffic of both interfaces of the wire. The workers are on the cores from 4 to 9 (0x3F0=1111110000). Cores from 0 to 2 are unassigned (general purpose cores).
Worker process instances are numbered starting by one. In the example, worker instance 1 is on core 4 and worker instance 6 on core 9.
You can see the worker instance handling a specific subscriber looking at the Additional details section in the subscriber dashboard.
Find out which cores are overloaded
Go to Statistics->System->CPU and identify the CPU cores which are busy over 80% or more. Look back at the last 24 hours because the high load may have happened in the past.
Identify whether the affected CPU cores are IOs or workers.
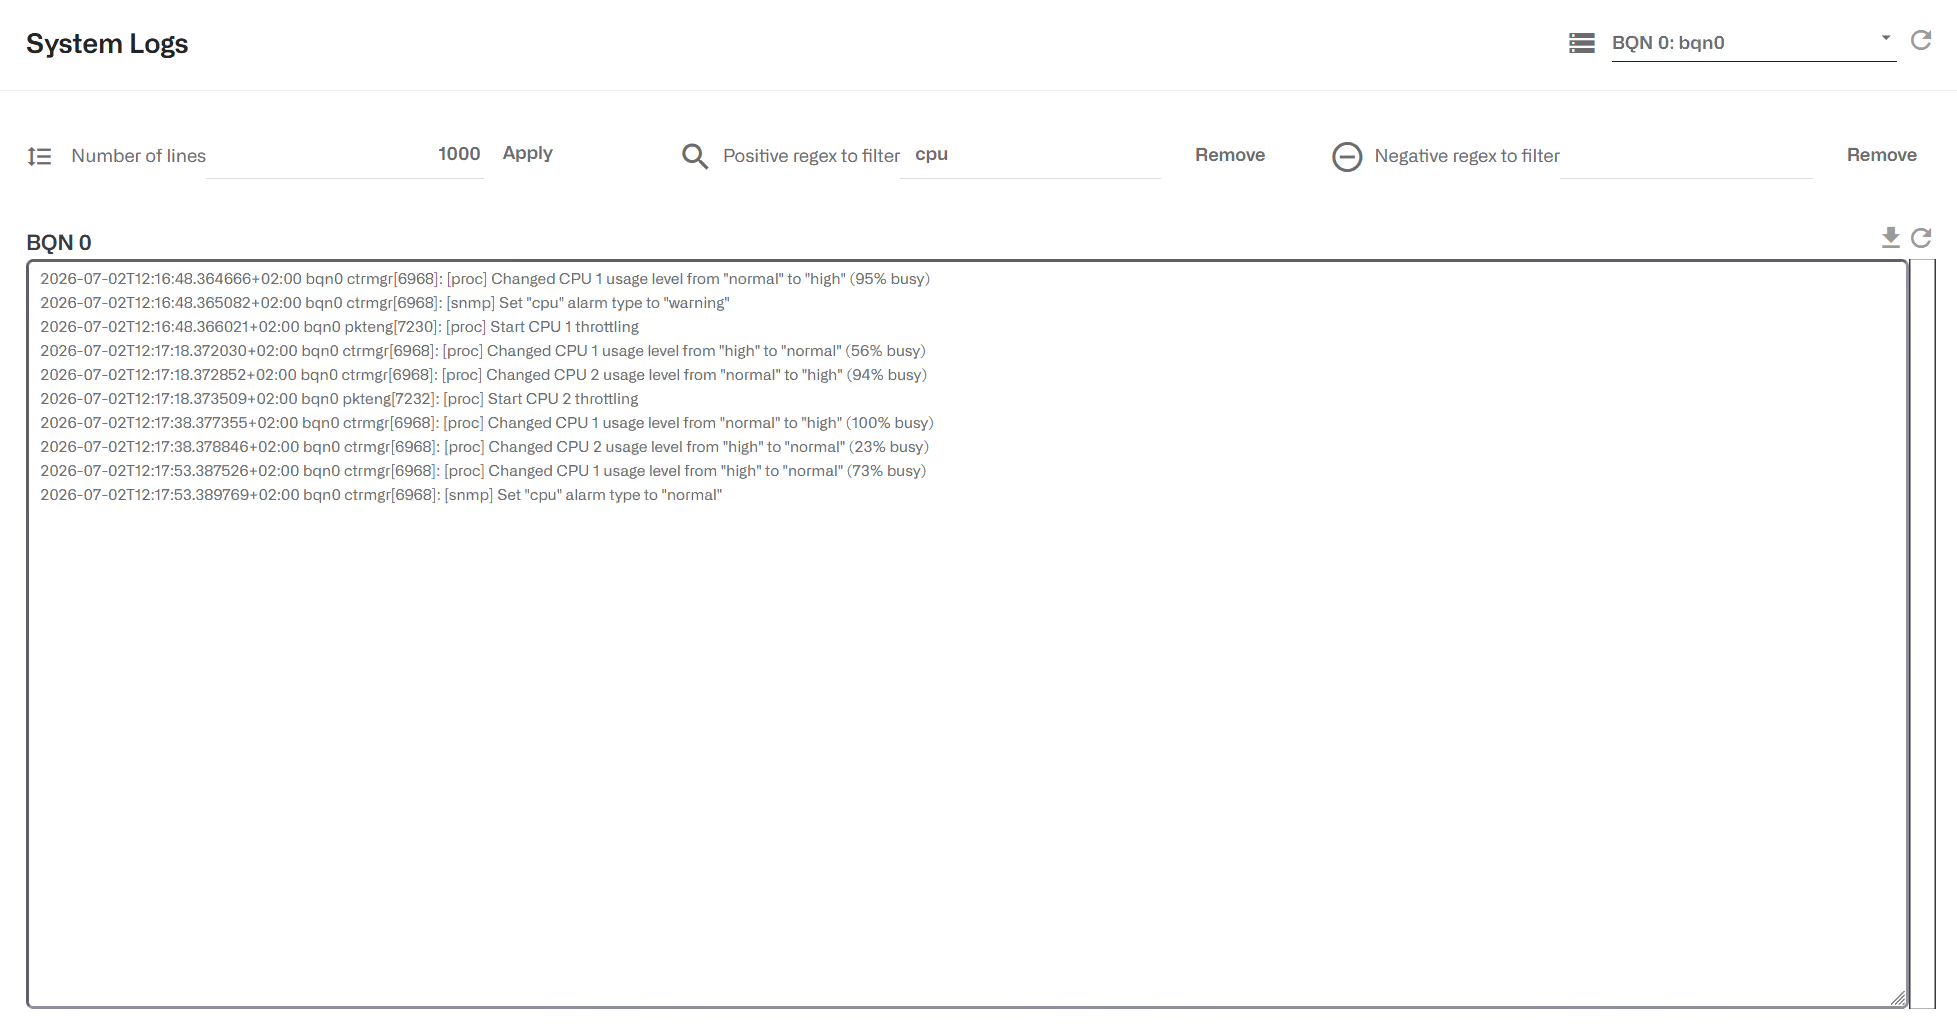
Sometimes the CPU load peaks are brief and are not visible in the system statistics, because those statistics show an average during 5 minute intervals. Go to Administration->Logs->System.
Increase the number of lines (e.g. 1000 lines) and set the Positive regex to filter to “cpu”. This should show the CPU alarms generated and, more importantly, a log entry indicating which specific CPU core is affected. In the following example, code 6 goes to high alarm state because of a 94% usage:
Core 6 is a worker in our example.
High load of worker CPU cores
The usual culprit is unbalanced traffic. BQN uses subscriber IPs to distribute the traffic across the available workers. If a few IP addresses concentrate too much traffic, the workers handling them may be overwhelmed.
Go to Statistics->Subscribers->Top By Time tos ee how traffic is distributed among the subscribers with the heaviest usage. See if the top ones concentrate much more traffic than the rest.
To confirm, right-click on the IPs with the heaviest usage to go to their subscriber dashboard and check the Instance number in Additional Details. For example, in the example we are following, if the worker core is number 6, the expected instance is 3. The instance must match the one reported in the system logs.
If no unbalanced traffic is found, the issue may be caused by high traffic levels in general. In that case, the worker core with high load will change from time to time. Go to Statistics->Throughput->Overview and see if traffic peaks correspond with worker peaks.
A hardware upgrade may be needed. Contact Bequant support.
In the meantime, the BQN has internal mechanisms to mitigate high load of worker cores, trying to prevent traffic losses by reducing the amount of optimized traffic.
Other mitigation steps you can take while waiting for the hardware upgrade:
- Enable bypass for those IPs causing the overload. Those IPs will not have their traffic optimized nor rate-limited, but the load of the affected cores should be reduced, as no traffic processing will be done in the workers for those IPs.
- If you are using NAT between the BQN and the end subscribers, increase the number of IPs used by the NAT, so the BQN can distribute the traffic among more addresses.
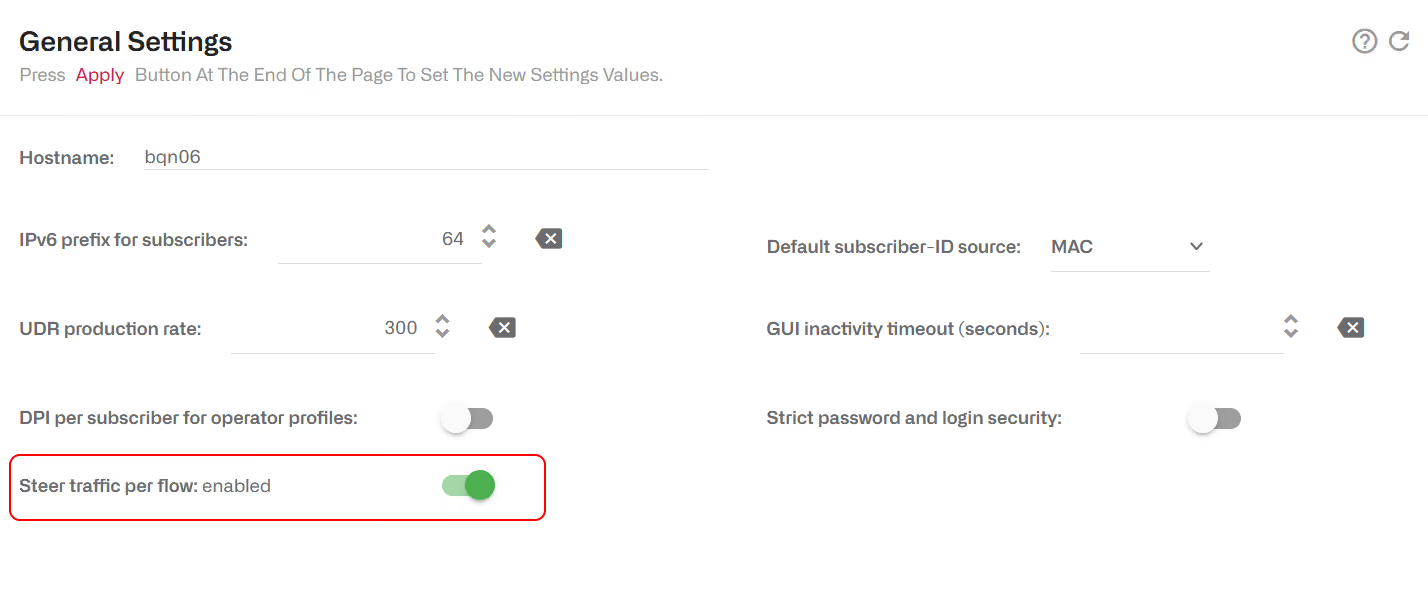
If the BQN server is used only for TCPO and/or per-flow speed limits, the CPU load distribution can be improved enabling per-flow steering. Per-flow steering distributes the traffic load across CPU cores per individual flow, instead of the default per-subscriber trafficdistribution. This improves CPU load balance, but because per-subscriber control is done per core, does not allow subscriber-level control, such as ACM, policy rates or per subscriber flow limits.
High load of IO CPU cores
High load of IO cores is a critical issue because some packets will not be relayed and therefore, they will be dropped because of insufficient core processing capacity.
The issue is normally caused by high traffic levels. Go to Statistics->Throughput->Overviewto verify that traffic peaks correspond to peaks in the affected IO cores.
Another possibility is that the network interface in the BQN server does not support load distribution of the traffic among several IO processes. This happens with PPPoE traffic in some network card models. See Supported Network Interfaces and XL710 troubleshooting.
Another possible cause is a wire in pcap mode, which limits its capacity to around 1 Gbps of throughput1. If this was a misconfiguration and the network card is Intel compatible, go to Configuration->Interfaces->Data Wires and change the wire to be in normal (DPDK) mode.
A hardware upgrade may be needed. Contact Bequant support.
In the meantime, one possible action is to make changes to the CPU core affinities, reassigning worker cores or unassigned cores to the IOs processes. Bequant support will help you with that.
High Memory Load
If the Memory icon in the Dashboard is not in green, some processes are running out of memory.
There are two alarm types, depending on the memory loadlevels:
- Orange if some processes reach high usage (above 90% usage).
- Red if some processes reach very high usage (above 95% usage).
Find out memory usage
Go to Statistics->System->Memory and identify what is the memory whose usage is above the threshold. Look back at the last 24 hours because the high usage may have happened in the past.
The system memory is divided into three sections:
- DPDK pool: it is the system memory reserved for the DPDK library and stores traffic packets. In NUMA servers, each NUMA will have its own DPDK pool to store traffic involving the network cards inserted in that NUMA.
- Memory pool (mpool): it is the system memory used by worker processes to store information about flows, subscribers and traffic metadata.
- Rest of the system memory (20% of the total): it is used by the rest of the system, for example by the API manager interacting with external billing systems, management tasks, etc.
One common cause of high memory usage is excessive traffic throughput. Check if Statistics->Throughput->Overview peaks correspond to peaks in Statistics->System->Memory.
Sometimes the memory usage peaks are brief and are not visible in the system statistics, because those statistics show an average during 5 minute intervals. Go to Administration->Logs->System.
Increase the number of lines (e.g. 1000 lines) andset the Positive regex to filter to “memory”. This should show the memory alarms generated
A log entry indicating that the DPDK pool is suffering high usage looks as follows (in this example, the DPDK pool is at 92% usage):
DPDK pool is shared among all workers and therefore the fact that the alarm is generated when worker instance 2 was asking does not conclude that it is instance 3 the one responsible of the high usage.
A log entry indicating that the mpool is suffering high usage looks as follows (in this example, the mpool is at 96% usage):
mpool is equally split among all workers, each with its own subpool, and, therefore, the worker instance where the alarm is generated is the one responsible of the high usage (worker instance 3 in our example).
A hardware upgrade may be needed. Contact Bequant support.
In the meantime, the BQN has internal mechanisms to mitigate high memory usage, trying to prevent traffic losses by reducing the amount of optimized traffic.
High usage of DPDK pool
This can be caused by bad NUMA configuration: in NUMA servers, we expect the network cards to be split between the two NUMAs. If all the network cards are in the same NUMA, the DPDK pool of the other NUMA will not be used while the DPDK pool of the NUMA with all the network cards will have high usage.
To solve the issue, the network cards should be reallocated,so they are distributed between the two NUMAs of the server. Bequant support will help you with that and also in fine-tuning the DPDK pool usage in the meantime. In addition to that, some traffic can be placed in bypass going to Configuration->Optimization Settings.
High usage of mpool
If only a few worker instances are involved in the problem, then it may be caused by unbalanced traffic. BQN uses subscriber IPs to distribute the traffic across the available workers. If a few IP addresses concentrate too much traffic, the workers handling them may run out of memory.
Go to Statistics->Subscribers->Top By Time to see how traffic is distributed among the subscribers with the heaviest usage. See if the top ones concentrate much more traffic than the rest.
To confirm, right-click on the IPs with the heaviest usage to go to their subscriber dashboard and check the Instance number in Additional Details. For example, in the example we are following, it will be instance 3. The instance must match the one reported in the system logs.
High mpool usage can also be caused by a high level of concurrent subscriber and/or traffic flows.
This issue will require a hardware update. In the meantime, the IPs with concentrated traffic can be placed in bypass going to Configuration->Optimization Settings.
High usage of system memory
This can be caused by a high level of traffic, concurrent subscriber and/or traffic flows and synchronization exchange with external billing systems.
The memory will be paged into disk and that will slow downthe server significantly, so the recommended action is going to Configuration->Optimization Settings and enabling bypass of all traffic while the memory is upgraded.
No RADIUS synchronization
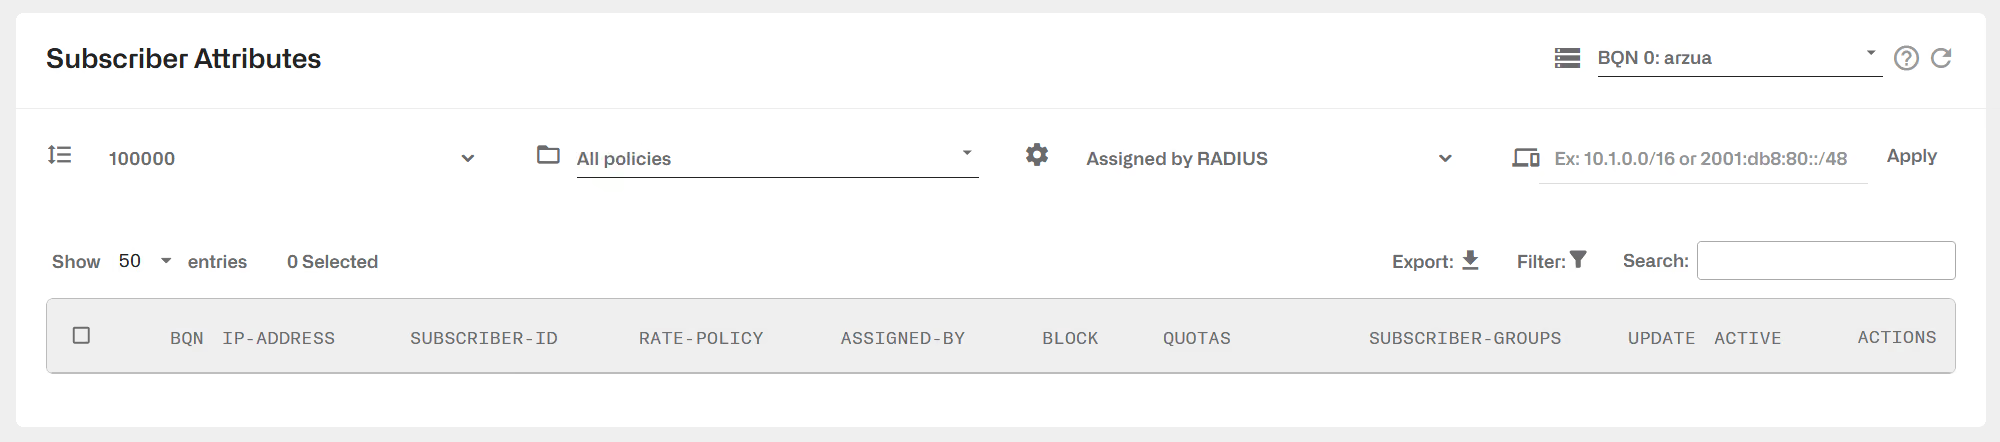
The RADIUS is configured in Configure->RADIUS/REST/Billing but no RADIUS information is found in Status->Subscribers->Subscriber Attributes: filtering by Assigned by RADIUS shows no subscriber.
Check reception of RADIUS traffic
Capture RADIUS traffic in Status->Interfaces->Link State selecting the management interface (the one with the MGT column checked) and using “port 1812 or port 1813” as filter:

Set the capture timeout to a period higher than your accounting interim interval.
It is also possible to capture RADIUS traffic using the CLI. Connnect via SSH:
If no traffic is captured, the RADIUS messages are not reaching the BQN server. . See next section.
No RADIUS messages received
If the BQN firewall is configured (Configuration->Interfaces->Management Firewall), all RADIUS client IPs must be added (in this example,10.10.10.10 and 10.10.10.11).

If RADIUS messages are still not received, the rest of the traffic jumps need verification. In our example, RADIUS clients are in subnet 10.10.10.0/24 and BQN in subnet 192.168.0.0/24. Verify that there is a valid route between the two subnets and that no intermediate firewall is blocking UDPport 1813 (RADIUS Accounting) and, if in RADIUS proxy mode, UDP port 1812 (RADIUS Authentication).
Check the system log
If RADIUS messages are received, but without RADIUS synchronization, review the system logs.
Go to Administration->Logs->System and use “RADIUS”regexp.
If no system log entry is found, you can increase its level. Access the BQN server via SSH:
Wait for some time and look again in Administration->Logs->System with “RADIUS” regexp.
For example, this log entry indicates that the IP 10.10.10.10 is unknown:
Go to Configuration->RADIUS/REST/Billing->RADIUS and add the address as a valid RADIUS client.
This other log entry indicates that the secret used by the client does not match the one in the BQN:
Go to Configuration->RADIUS/REST/Billing->RADIUS and check that the secret of the RADIUS client is correct.
Enable the API logs
If RADIUS messages are received, but without RADIUS synchronization, an alternative to the system logs are the API logs.
Enter the BQN server shell via ssh:
And see the API logs with the command:
An example of a successfully received Accounting Start message and the corresponding response from the BQN to the RADIUS client:
The RADIUS message associates rate policy RA-30M/40M-60M/80M-50M/70M-2/3 to subscriber IP address 10.0.0.1.
The following is an example of a received Accounting Start message that is processed and replied OK but with an issue in the policy rate name:
No rate policy name could be extracted from the RADIUSmessage: policyName(n/a). If this happens, go to the Check AVP parameters section.
Check RADIUS AVP parameters
If RADIUS messages are received and accepted and yet the BQN shows no attributes coming from RADIUS, check in the received RADIUS traffic captures that the messages contain the expected AVPs.
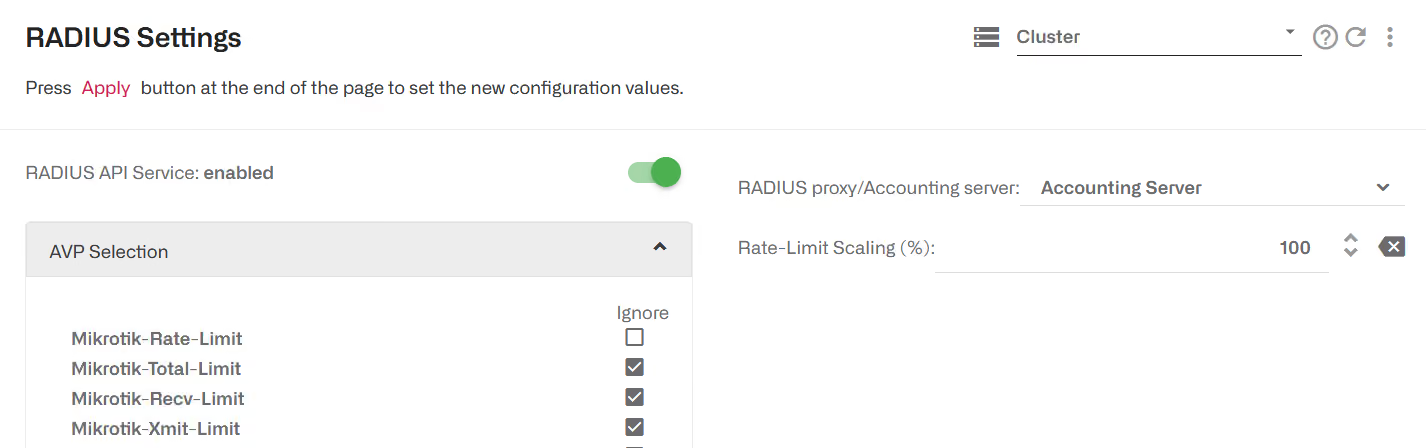
Also, go to Configuration->RADIUS/REST/Billing->RADIUS and check in the AVP Selection section that the AVP with the rate policy is listed (and therefore supported by BQN) and it is not being ignored. For example, if Mikrotik-Rate-Limit AVP is used:
No REST synchronization
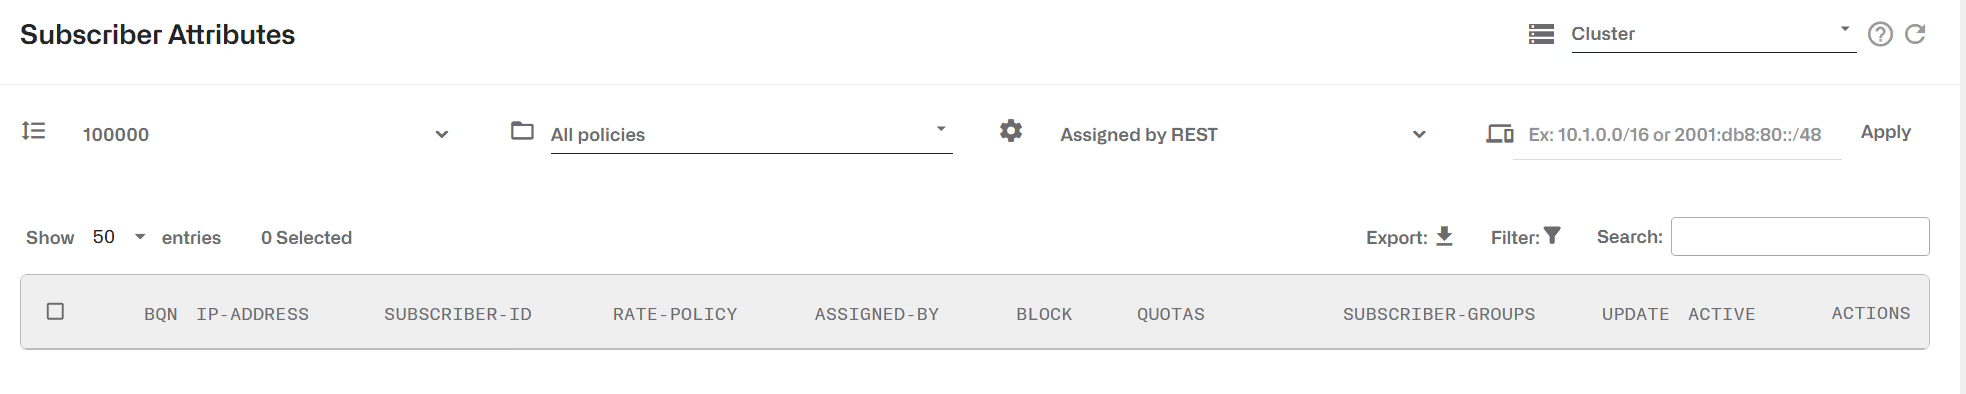
REST is configured in Configure->RADIUS/REST/Billing->REST but no REST information is found in Status->Subscribers->Subscriber Attributes: filtering by Assigned by REST shows no subscriber.
Check reception of REST traffic
Capture REST traffic in Status->Interfaces->Link State selecting the management interface (the one with the MGT column checked) and using “tcp and port 3443” as filter:

Send some REST queries to the BQN OAM IP address.
It is also possible to capture REST traffic using the CLI. Connect via SSH:
If no traffic is captured, the REST messages are not reaching the BQN server. See next section.
No REST messages received
If the BQN firewall is configured (Configuration->Interfaces->Management Firewall), all REST client IPs must be added (in this example, 10.10.10.10 and10.10.10.11).
If REST messages are still not received, the rest of the traffic jumps need verification. In our example, REST clients are in subnet 10.10.10.0/24 and BQN in subnet 192.168.0.0/24. Verify that there is a valid route between the two subnets and that no intermediate firewall is blocking TCP port 3443.
Check the system log
If REST messages are received, but without REST synchronization, review the system logs.
Go to Administration->Logs->System and use “REST|HTTP” regexp.
If no system log entry is found, you can increase its level. Access the BQN server via SSH:
Wait for some time and look again in Administration->Logs->System with “REST|HTTP” regexp.
For example, this log entry indicates that the IP 10.10.10.10i s unknown:
Go to Configuration->RADIUS/REST/Billing->REST and make sure the address is a valid REST client.
This other log entry indicates that the user or the user password is incorrect:
Go to Configuration->RADIUS/REST/Billing->REST and check that the user and user passwords are the ones used by the REST client.
Enable the API logs
If REST messages are received, but without RADIUS synchronization, an alternative to the system logs are the API logs.
Enter the BQN server shell via ssh:
And see the API logs withthe command:
An example of a successfully received REST query and the BQN response:
The following is an example of a received REST query with an unknown URI (the query has not been formed correctly):
Enable the API traces
If we have identified that there is an issue in one of the requests, we can find out which one is causing the problem by enabling API traces. This will generate a trace file per each request or response.
Enter the BQN server shell via ssh:
And the BQN will generate traces of the last 5 REST requests and responses. The traces can be found in the directory /opt/bqn/var/trace. Login using ssh:
First request/response is OK:
Second request/response has an error:
The POST request has a wrong body. Review the REST clientPOST request and compare it with the REST API reference manual. In this example,the POST body had a typo (double quotes after value missing): {"subscriberId": "myid}
REST certificate issue
If a REST API requests gets an error related to certificate verification, for example:
The reason is that the BQN certificate is self-signed and the client must disable the certificate validation. For example, using curl:
And using python:
REST TLS version
BQN uses TLS 1.2. Some new versions of python reject TLS 1.2 by default. To make it accept it, use the following code:
A full example of this can be found here.
No Billing synchronization
If the Billing system is configured and the Billing icon in the Dashboard is red, the access to the Billing system is failing.
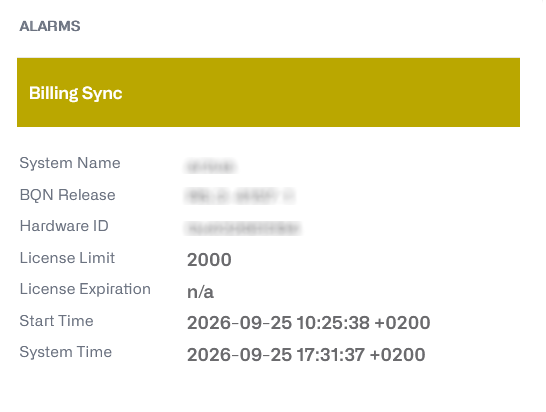
Click on the billing icon to go to the billing status page:
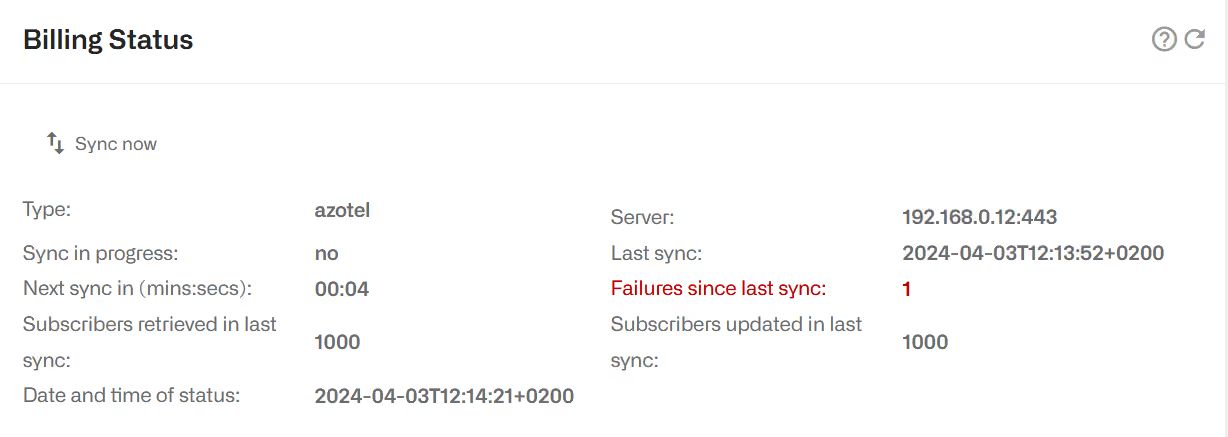
In this example, there was a successful synchronization at 12:13:52 retrieving 1000 subscribers, but there was one failed attempt afterwards. You can force a synchronization attempt pressing the Sync now button.
If the failure remains, follow these steps:
- Check the billing access credentials: API key, user/password, etc. These credentials must be registered in the billing system.
- In same billing systems (e.g. Splynx), access to specific REST API calls needs to be granted.
- In some billing systems (e.g. Azotel), the source IP address from which the billing is being accessed also needs to be authorized. This will be the public IP address that reaches the billing system from the BQN management address (the same if the BQN server uses a public IP address).
- Check that the billing server IP address can be determined. If it is not, the BQN will show 0.0.0.0 in the Server field of the Billing Status. This can be due to an unknown server name or because the BQN has no DNS server configured. To configure a DNS server, go to the management interface page.

- Check that the billing IP address is reachable from the BQN server:
Check the system log
Go to Administration->Logs->System and use “billing” regexp.
If there is a problem reaching the billing server, you will see a message like:
If no system log entry is found, you can increase its level. Access to the BQN server via SSH:
Wait for some time and look again in Administration->Logs->System with “billing” regexp:
In this first example, a request has returned an error: the HTTP code is 200, but it contains the REST level error code RATE_LIMITED.
And if you search for %ERR-EINVAL:
The BQN complains that it cannot get the “accounts” from the billing system.
These two logs show the root cause: the issue happens because the API key has exceeded its request rate budget. The solution would be to increase the budget.
Another example of a request error:
Here, the billing system returns an HTTP 401 code with the internal code UNAUTHORIZED. So the root cause in this other example is in the access credentials: either the api key or complementary credentials are incorrect or the BQN is accessing the billing from a not authorized IP address.
Enable the API logs
If the billing server is reachable and yet the synchronization fails, and no syslog entry is found, go deeper in the analysis enabling the API logs. Enter the BQN server shell via ssh:
And see the API logs with the command:
An example of a successful request (POST to get “products” array in this case):
And an example of an unsuccessful request (related to an attempt to query the billing “accounts”):
Enable the API traces
If we have identified that there is an issue in one of the requests,we can find out which one is causing the problem by enabling API traces. This will generate a trace file per each request or response.
Enter the BQN server shell via ssh:
And the BQN will generate traces of the last 5 requests and 5 responses between the BQN and the billing system. The traces can be found in the directory /opt/bqn/var/trace. Log in using ssh.
Look for a request involving “accounts”:
And once we identify the request (0001 in this example), check the response with the same Id:
In this case, the issue happens because the API key has exceeded its request rate budget. The solution would be to increase the budget.
Interact with the Billing server directly using curl
If the cause of the issue is still unknown, you can send a request directly to the billing system using the Linux curl command. You can do it from a server different from the BQN server, unless the billing is only accessible from the BQN. This task requires expertise of the billing system and the API request conventions. For example, to send a query to an Azotel billing:
No NTP Servers Synchronized
If the NTP icon is yellow, the NTP is not configured. Click on the icon to go to the configuration page.
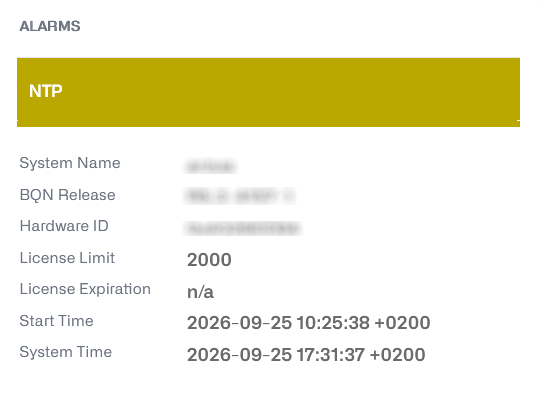
If the NTP servers are configured but the BQN cannot synchronize with any of them, the NTP icon in the dash will be in orange.
An abrupt change in the system time because of lack of NTP synchronization, may lead to brief service losses while the system adjusts. To avoid this from happening, have always at least one NTP server in sync.
You can check the list of configured NTP servers in Administration->System Date->NTP Servers.
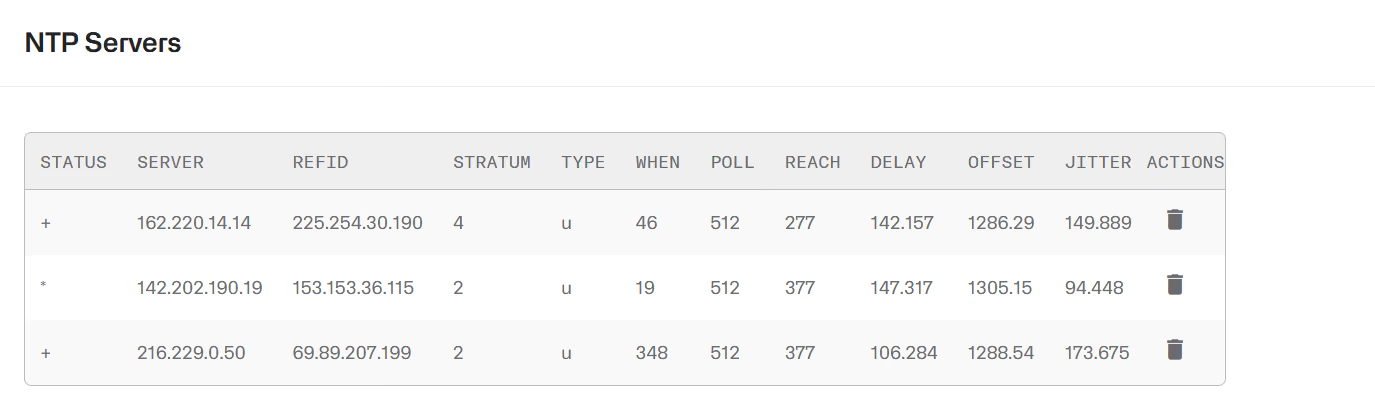
At least one NTP server should be synchronized. In the example above, the NTP server 145.238.203.14 has been chosen for clock synchronization (indicated by the * next to the server IP address) and has been contacted 36 seconds ago (column WHEN).
If no NTP server is available, the BQN will show the warning message NTP not synchronized, as in the window below:
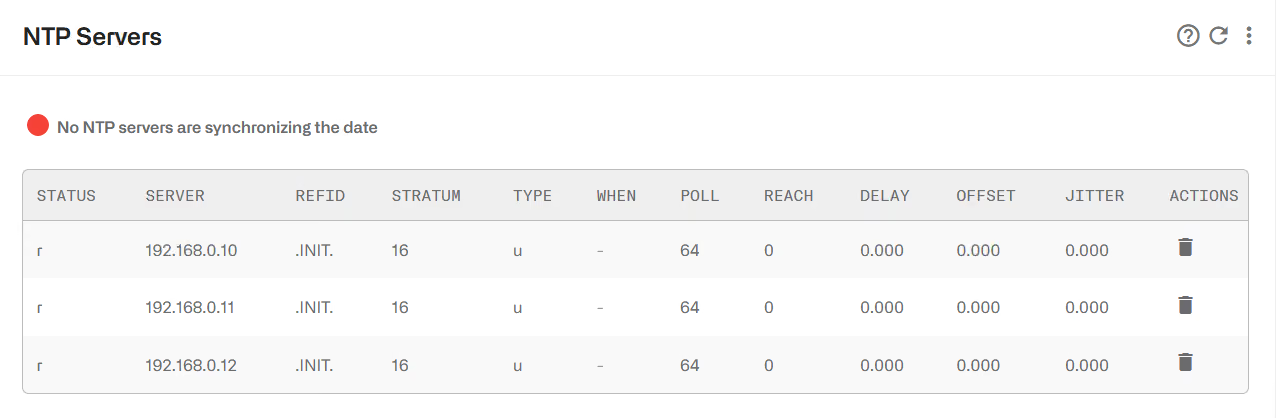
To solve the issue, if you have a local NTP server, add it to the list clicking the <i class="fa-solid fa-ellipsis-vertical"></i> menu icon and selecting Add Server…
If you have no local NTP servers, make sure the UDP port 123 is open from the BQN management IP to the Internet, including in the BQN firewall, if activated.
The REACH column will indicates successful attempts to reach the server. A 0 indicates that the server is unreachable.
If an NTP server does not appear synchronized despite being reachable, try deleting it and adding it again.
While the lack of NTP synchronization is being fixed, check the current time and date in the System Time of Dashboard and compare it with the current time. If the difference is small, it is not a critical issue, though it should be fixed to avoid becoming urgent in the future.
Disk Issues
To check the status of the system disk, click on the DISK icon of the dashboard:
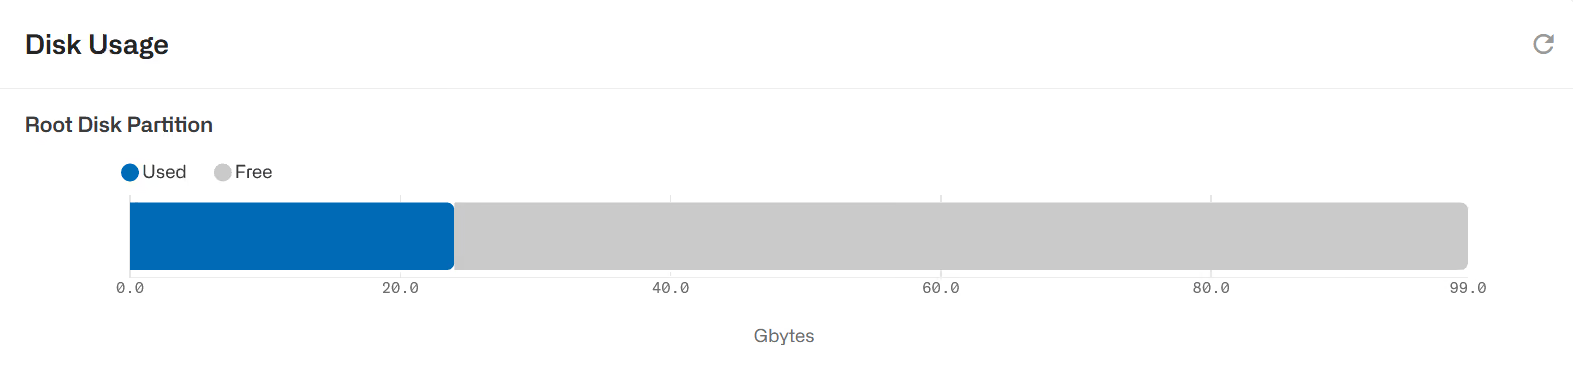
The disk icon will be in orange (warning state) when less than 15% of the disk storage is free.
Intel network card XL710 does not reach 40 Gbps of PPPoE traffic
An Intel XL710 network card handling PPPoE traffic, may be limited to 10 Gbps throughput despite having negotiated a 40 Gbps link. A possible reason is that the card is not doing load balancing of PPPoE traffic and packets are delivered to one single process, limiting the maximum throughput.
The packet distribution functionality in the Intel card is implemented by Intel Dynamic Device Personalization (DDP). Three conditions must be met:
- The BQN bqnkernel package must be R3.0.19 or later. Requires a system reboot after the packet installation.
- The card firmware version must support DDP with PPPoE load balancing (see section below).
- The BQN bqn package must be R4.27 or later.
Networkcard firmware update
The following firmware update procedure works only with Intel network cards. Network cards of vendors other than Intel using an Intel chipset cannot be updated by this procedure.
PPPoE distribution requires firmware version 7.0 and DDP version 1.1.6.1 (in theory, firmware version 6.01 would also work, but this has not been verified in our lab).
The following procedure involves traffic interruption and server reboots, so the BQN server must be taken off the traffic path.
First, to verify the card firmware version, the XL710 interface ports must be accessible by the OS, i.e., not being under DPDK control. Therefore, if any of the interface ports are part of a wire, they must be placed in pcap mode. In the BQN GUI, go to Configuration->Interfaces->Data Wires and remove the wires with ports of that network card and create them again with the ports in pcap mode.
Once this is done, the interfaces should be visible, and the firmware version can be obtained using the ethtoolcommand:
In this example, the firmware version is 5.0 and the card needs an update. The rest of the section described how to do this.
To make a firmware update, the server needs to boot so the OS kernel allows such changes. Make a backup of the grub configuration file before editing it:
In the first menu entry, add iomem=relaxed in the linuxboot line. The line will look similar to this:
Save the file and reboot the server.
Download the Intel update tool for the X700 family to your PC, unzip it and transfer the Linux package to the BQN server. Example:
Go to the BQN server to unpack the tarball and run the update tool:
The tool will guide you through the firmware update process for all X710 network cards detected on the system.
After completing the firmware update, restore the wires to normal mode (no pcap). In the BQN GUI, go to Configuration->Interfaces->DataWires and remove the wires with ports of that network card and create themagain with the ports in normal mode (pcap box not ticked).
Remove the iomem=relaxed parameter from grub configuration file and reboot the system:
Checking that PPPoE load distribution is enabled
Once the network firmware, bqnkernel and bqn packages are on the right version, the load distribution of PPPoE traffic should be enabled in each XL710 network port by default. For example:
The show command indicates that there is one DDP profile(for PPPoE) and the load distribution is enabled.
Disabling PPPoE load distribution
If there are any issues with the network card and the DDP profile, the DDP can be disabled using the no ddp pppoe command in all ports of the network card, followed by the system interface ddp reset in any of those interfaces. For example:
The command system interface ddp reset unloads theDDP profile without a need of a system reboot. Note that it is enough to apply it to one of the ports to reset the whole network card.
If the issue persists, keep the no ddp pppoe in all ports of the network card, and do a system reboot.
Lorem ipsum dolor sit amet, consectetur adipiscing elit. Suspendisse varius enim in eros elementum tristique. Duis cursus, mi quis viverra ornare, eros dolor interdum nulla, ut commodo diam libero vitae erat. Aenean faucibus nibh et justo cursus id rutrum lorem imperdiet. Nunc ut sem vitae risus tristique posuere.
Lorem ipsum dolor sit amet, consectetur adipiscing elit. Suspendisse varius enim in eros elementum tristique. Duis cursus, mi quis viverra ornare, eros dolor interdum nulla, ut commodo diam libero vitae erat. Aenean faucibus nibh et justo cursus id rutrum lorem imperdiet. Nunc ut sem vitae risus tristique posuere.
Lorem ipsum dolor sit amet, consectetur adipiscing elit. Suspendisse varius enim in eros elementum tristique. Duis cursus, mi quis viverra ornare, eros dolor interdum nulla, ut commodo diam libero vitae erat. Aenean faucibus nibh et justo cursus id rutrum lorem imperdiet. Nunc ut sem vitae risus tristique posuere.